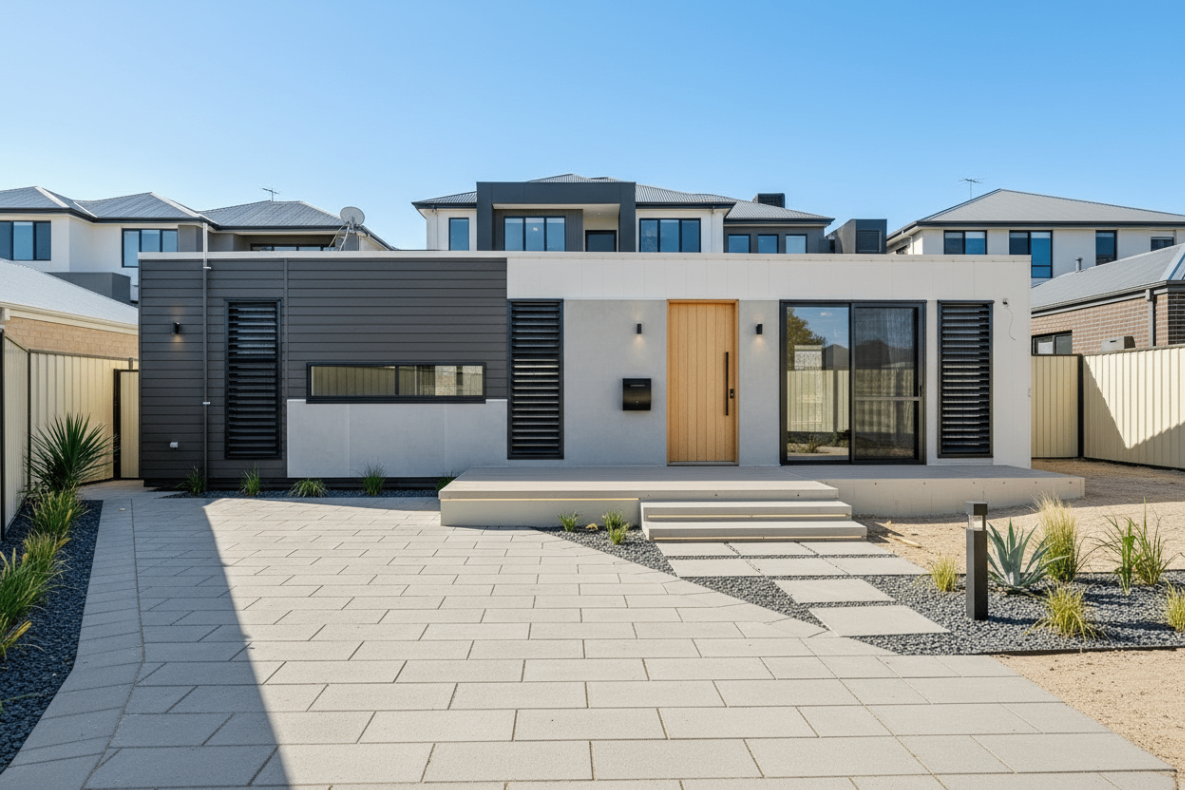
So, you’ve pulled the trigger. You’ve picked out a stunning, energy-efficient modular home, and you’re already picturing yourself having a coffee on that timber deck. It’s an exciting time: but before the truck rolls up with your new house in tow, there is one critical phase you can’t afford to overlook: site preparation.
In the world of prefab construction, your land is the foundation of your success. Literally. If the site isn't ready, the delivery becomes a nightmare. If the ground isn't level, your doors won't shut. If the drainage is poor, you’re looking at long-term structural headaches.
At EcoHub Homes, we make the building process fast and seamless, but the "site prep" is where you, the landowner, take the lead. Don’t sweat it, though. This guide breaks down exactly what you need to do to turn that empty patch of dirt into a perfect pad for your new home.
1. The Regulatory Groundwork: Permits and Zoning
Before a single shovel hits the dirt, you need to know what you’re allowed to do. Every local council has its own set of quirks. You might think your backyard is the perfect spot for a modular home investment, but the zoning office might have other ideas.
Start with these questions for your local planning office:
- Zoning: Are manufactured or modular homes allowed on this specific parcel?
- Setbacks: How far must the home be from property lines, roads, or existing structures?
- Foundation Types: Does the council mandate a specific type of foundation (e.g., concrete slab vs. piers)?
- Environmental Factors: Are there bushfire (BAL) ratings or flood zone requirements you need to meet?
Getting your permits: grading, foundation, utility, and building: can take time. Start early. Nothing stalls a project like a delivery truck ready to go and a missing piece of paper from the council.
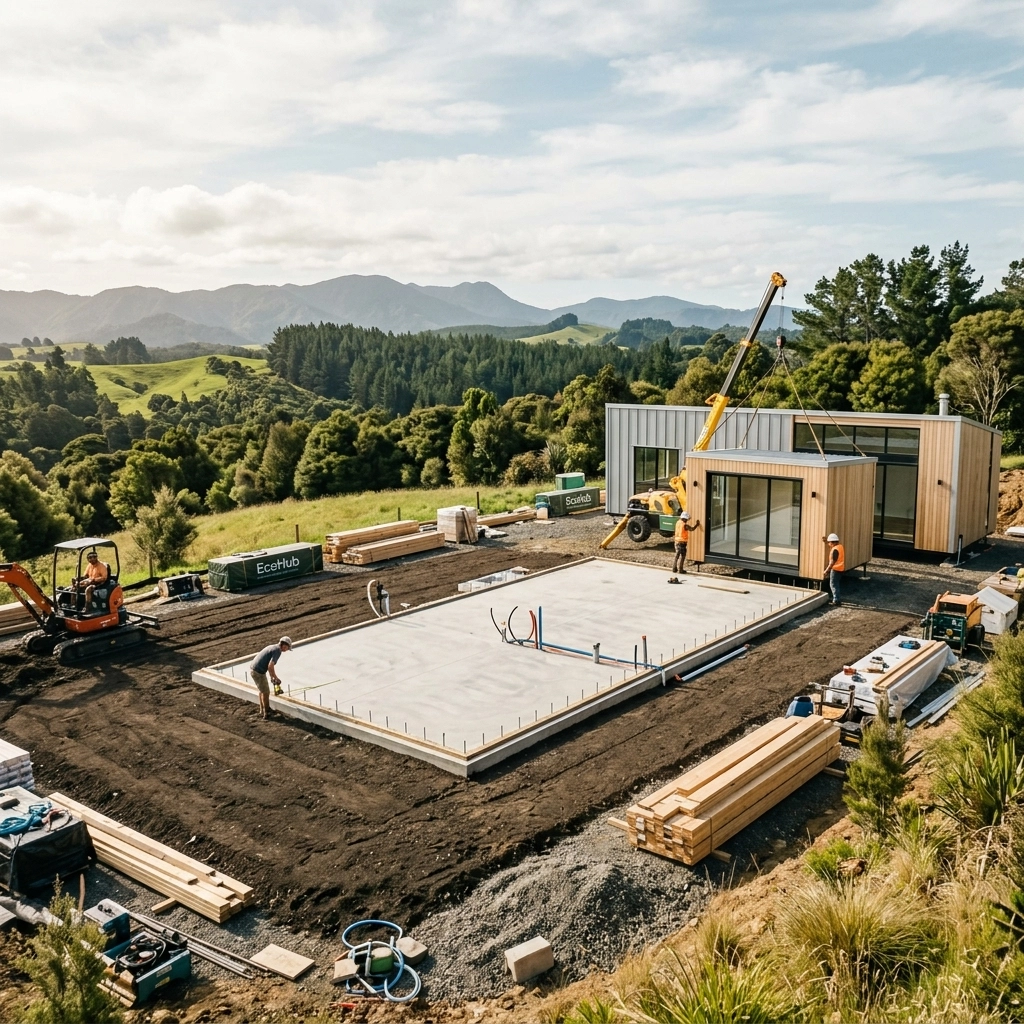
2. Access: Can the House Actually Get There?
This is the most common "gotcha" in the industry. A modular home is delivered on a large heavy-duty trailer. It isn't a small car; it needs space. If your driveway is a winding, tree-lined track, we need to talk about clearances.
The Golden Rules of Access:
- Width: You generally need at least 4 to 5 metres of horizontal clearance.
- Height: Look up. You need about 4.5 to 5 metres of vertical clearance to clear branches and power lines.
- Turning Radius: Big trucks don’t do 90-degree turns on a dime. Ensure any corners are wide and reinforced.
- The Ground: If the ground is soft or muddy, the truck will sink. You may need to lay down temporary road plates or extra gravel.
3. Soil Testing and Site Assessment
Not all dirt is created equal. Before you pour a slab or set piers, you need a geotechnical report (a soil test). An engineer will tell you the "bearing capacity" of your soil. This determines if your foundation needs to be standard or extra-reinforced to prevent the home from settling or cracking over time.
While you're at it, look at the "lay of the land." You want a high, well-drained spot. Avoid the low-lying "swampy" section of the lot, even if the view is better. Remedying a wet site later is ten times more expensive than picking the right spot now.
4. Choosing Your Foundation Type
Your choice of foundation usually depends on three things: your budget, your soil type, and the slope of your land. Here are the three heavy hitters in the modular world:
Option A: The Concrete Slab
The most "permanent" feeling foundation. It’s a solid block of concrete poured onto the ground.
- Pros: Extremely stable, great for flat lots, and often preferred for urban infills.
- Cons: Most expensive option and requires precise plumbing "stub-outs" because you can’t move them once the concrete sets.
Option B: Piers (Steel or Concrete)
Commonly used in Australia, especially for sloping sites or bushland settings. The home sits elevated off the ground.
- Pros: Minimal site disturbance, excellent for drainage, and much easier to level on uneven ground.
- Cons: You’ll likely want "skirting" around the base to hide the gap.
Option C: Compacted Gravel Pad
Common for smaller units or temporary placements. You excavate the topsoil and replace it with layers of crushed stone, compacted until it's rock-hard.
- Pros: Cost-effective and provides great drainage.
- Cons: Not always allowed by councils for permanent primary dwellings.

5. Utilities: Bringing the Site to Life
Your EcoHub home comes "plug-and-play" ready, but you need something to plug it into. You’ll need to coordinate with local contractors to bring services to a "stub-out" point: the exact spot where they will connect to the home.
- Water: Run your lines to the site and install a meter. If you’re off-grid, this is the time to set up your rainwater tanks and pumps.
- Power: Decide between overhead or underground power. Underground is cleaner but requires trenching.
- Sewer/Septic: If you have town sewer, you’ll need a junction at the pad. If you're rural, your septic system should be installed and ready before the house arrives.
- The "Stub-Out" Precision: Ensure your plumber and electrician have the floor plan of your EcoHub home. The pipes need to come out of the ground exactly where the home’s internal plumbing starts.
6. Drainage: The 10-Foot Rule
Water is the enemy of any foundation. Your site grading must ensure that water runs away from the home, not toward it.
The industry standard is the "10-foot rule": the ground should slope downward for at least 3 metres (10 feet) in every direction away from the house. A simple 2% grade is usually enough. If your site is particularly wet, consider installing swales or a French drain system to divert runoff.
7. The Final Pre-Delivery Checklist
A few weeks before delivery day, walk your site with your contractor. Use this checklist to ensure you’re ready for the big reveal:
- Permits: All approvals are signed, sealed, and delivered.
- Clearance: All overhanging branches and "ornamental" gates have been removed from the access path.
- The Pad: Foundation is level within 12mm across the entire length.
- The Stubs: Water, sewer, and power conduits are in the correct position.
- Working Space: There is at least 1 to 2 metres of clear space around the pad for the install crew to move.
- Connectivity: If you’re using a crane, the crane pad is compacted and ready to hold the weight.
Why Preparation Matters
Preparing your site correctly isn't just about following rules: it’s about protecting your investment. A well-prepared site means a faster installation, fewer surprise costs, and a home that stays level and beautiful for decades.
While the list might seem long, you don’t have to do it alone. Most local earthmoving contractors are well-versed in site prep, and we are always here to provide the technical specs they need to get it right.
If you're still in the planning stages and want to know more about the total modular homes cost including site works, or if you're ready to see how a modular home fits on your specific block, we can help.
Ready to turn your land into a home?
Book a free consultation with our team today. We’ll walk through your site requirements and help you plan the perfect transition from a vacant pad to a premium prefab lifestyle.